Most of us think of vinegar as a specialty item. From fig and blueberry to Serrano and red wine, vinegars have come a long way from those big box store bottles of acidic white. Now they're used to dress up salads, punch up soups, and provide subtle flavors to your favorite dishes. And you can make them at home!
It's true. Homemade vinegars are a great way to put your touch on your dishes. First, homemade allows you to control the quality of ingredients in your vinegar. You may choose to use non-GMO, pesticide-free, or organic ingredients (unlike most store bought kinds).
Second, when you make your own, you control the aging process. Like it with a milder taste or a more potent one? Try your vinegar every few weeks until it's just right, instead of buying a multitude of store bought vinegars that don’t live up to your taste buds' expectation.
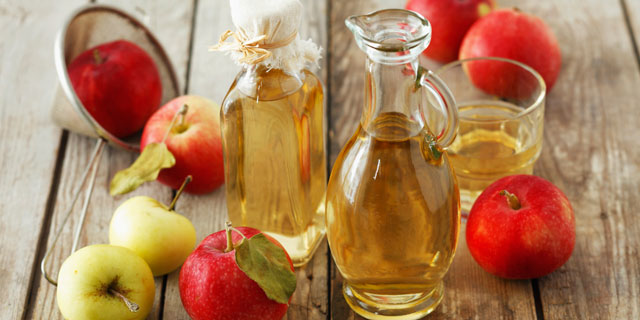
And lastly, the possibilities are endless. Instead of tracking down a flavor online or going to a specialty store, you can let your imagination run wild. From peach serrano vinegar to chile apple cider vinegar, we've got you covered.
Now that your taste buds are in a frenzy, get this: making your own vinegar is easy. You can use fruit scraps you have on hand, old wine, beer, anything that contains alcohol or sugar. You can also use a starter kit, which includes the bacteria needed to make your ingredients into vinegar gold.
Next, how to make your own vinegar at home… [pagebreak]
The Scrappy Way
This is great for fruit that's past its prime. You can use a variety of fruits, from apples and pears to peaches and plums. All you need is your fruit skins and meat, which can be overly ripe but not moldy, sugar water, mason jars, cheesecloth, and rubber bands.
Fill half of your jars with finely chopped fruit and the other half with sugar water, made by mixing 1/4 cup of sugar with one quart filtered water. Cover with a cheesecloth and rubber band to secure and allow to sit at room temperature. The cheesecloth will let air enter the jar to help the fruit ferment without letting in little critters.
After a week, strain the vinegar and discard fruit. Place liquid back into jar, cover with cheesecloth and rubber band, and allow to sit at room temperature for a few weeks. A gelatinous, thick film will rise to the top of your vinegar then settle at the bottom. This is the ‘mother,’ the bacteria that blooms and helps make your delicious vinegar a reality. Try not to disturb it when taste testing. Let your vinegar ferment from a few weeks to over 6 months. Once you’re ready, carefully pour your vinegar in a container fitted with a plastic lid and keep your mother in its own jar covered with vinegar – it’ll help you make your next batch!
The Pre-Made ‘Mother’ Way
You can buy the ‘Mother’ ready to go to help jumpstart your homemade vinegar adventures. Buying it ready-made means you can skip the first few weeks of making your own ‘mother,’ which gets you that much closer to your own vinegar creation!
The Raw-Unfiltered Vinegar Way
You can also jump-start your homemade vinegar journey by using raw unfiltered vinegar as your starter. Bragg’s is a common brand that is easy to find. You may notice that there is a lot of sediment at the bottom of the jar – you guessed it, that’s the ‘mother.’ Simply pour off the Bragg’s vinegar into a container until you are left with about a cup of all that lovely sediment. Use this cup as your starter. Then add your wine or fruit and sugar and complete the process, cheesecloth and all. Just remember: there should never be mold in your vinegar. If there is, trash the mother and the liquid, then sterilize your containers and start again.
Infused Vinegar
Want to jazz up some vinegar you have at home? Simple warm up your vinegar and pour into clean, sterilized jars filled with aromatic herbs, rinds, or spices of your choosing. Cap, ensuring the underside is plastic to prevent corrosion and keep it in a dark place. Gently shake every few days and in two weeks strain, pour vinegar into other sterilized containers, and store again in a dark place. Infused vinegar will remain flavorful for up to five months!
![Making Mealtime Matter with La Familia: Easy Sofrito [Video]](https://thelatinkitchen.com/wp-content/uploads/2015/10/sofrito-shutterstock__0-500x383.jpg)
![Easy Latin Smoothies: Goji Berry Smoothie [Video]](https://thelatinkitchen.com/wp-content/uploads/2015/12/goji_berry-shutterstock_-500x383.jpg)


![Fun and Fast Recipes: Fiesta Cabbage Salad [Video]](https://thelatinkitchen.com/wp-content/uploads/2015/11/fiesta_cabbage_slaw-shutterstock_-500x383.jpg)


